Consuming SOAP 🧼 services with Spring Boot 🍃 + Apache CXF
Despite being less used, SOAP services are still with us, there are old services still created using this standard to create APIs.
This is a continuation of this article, which I recommend you take a look at to get a bit of context.
In this continuation I am going to cover how to consume / make calls to SOAP services from Spring Boot, using Apache CXF.
To do this, as an example, we are going to use the service to consume the one created in the previous article, we will create a REST API from 0 that, when called, will make a request using the SOAP protocol, to call the service and return the information, all this with the library from Apache CXF.
Getting started with our project
As I usually do when starting a project with Spring, I use Spring Initialzr to choose the dependencies I need, in this case Spring Web, although I always like to add the Spring DevTools to improve the development experience.
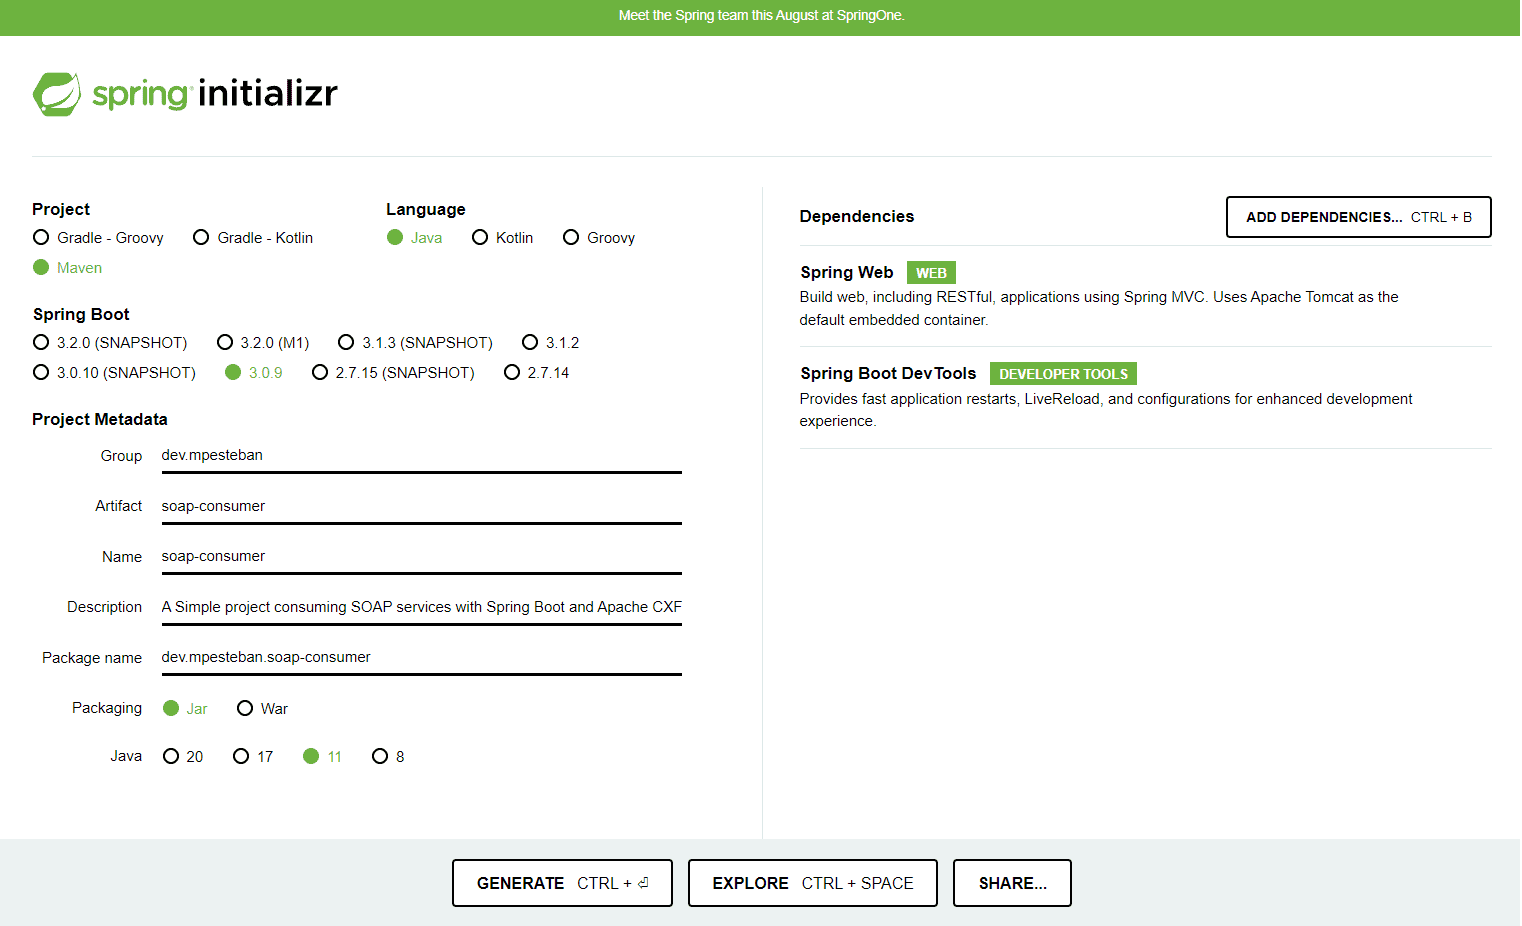
Additionally, we will also need to add the Apache CXF dependency and the plugin, the plugin who transforms from the definition file of the SOAP API (WSDL) that we provide to generate the corresponding interfaces to be able to make the calls to the service.
The first thing I have done is define which version of Apache CXF I am going to use inside <properties> tag on pom.xml
<properties>
    <java.version>17</java.version>
    <cxf.version>4.0.2</cxf.version>
</properties>
And on <dependencies> area I added the next dependencies:
<dependency>
	<groupId>org.apache.cxf</groupId>
	<artifactId>cxf-spring-boot-starter-jaxws</artifactId>
	<version>${cxf.version}</version>
</dependency>

<dependency>
    <groupId>org.apache.cxf</groupId>
    <artifactId>cxf-rt-features-logging</artifactId>
    <version>${cxf.version}</version>
</dependency>
And last thing to add is on <build> > <plugins> add the cxf-codegen-plugin
<plugin>
	<groupId>org.apache.cxf</groupId>
	<artifactId>cxf-codegen-plugin</artifactId>
	<version>${cxf.version}</version>
	<executions>
		<execution>
			<id>generate-sources-soap</id>
			<phase>generate-sources</phase>
			<configuration>
				<sourceRoot>${project.build.directory}/generated-sources/cxf</sourceRoot>
				<wsdlRoot>${project.basedir}/src/main/resources/wsdl/</wsdlRoot>
				<includes>
					<include>**/*.wsdl</include>
				</includes>
			</configuration>
			<goals>
				<goal>wsdl2java</goal>
			</goals>
		</execution>
	</executions>
</plugin>
In this last step we can see several tags:
-
<sourceRoot>serves to indicate the path where the classes generated from the WSDL will be stored,${project.build.directory}refers to thetargetfolder that Maven automatically generates to do a build. -
<wsdlRoot>Indicates where the WSDL files will be, within our project, this is because to actually use this WSDL we have two options:- Download the WSDL file and add it to our project.
- Use directly the URL of the WSDL
For the first option, we save the file in src/main/resources/wsdl, in this case it is important that the file format is in lowercase .wsdl since if we look at the XML tag <includes> it will We have indicated that within that folder collect all the files ending in .wsdl (and are case sensitive).
For the second, instead of using the <wsdlRoot> and <includes> tag, we will use the <wsdlOptions> tags and inside we will add an option indicating the URL, it would look like this
<plugin>
    <groupId>org.apache.cxf</groupId>
    <artifactId>cxf-codegen-plugin</artifactId>
    <version>${cxf.version}</version>
    <executions>
       <execution>
          <id>generate-sources-soap</id>
          <phase>generate-sources</phase>
          <configuration>
             <sourceRoot>${project.build.directory}/generated-sources/cxf</sourceRoot>
             <wsdlOptions>
                <wsdlOption>
                   <wsdl>http://localhost:8080/ws/Hello?wsdl</wsdl>
                </wsdlOption>
             </wsdlOptions>
          </configuration>
          <goals>
             <goal>wsdl2java</goal>
          </goals>
       </execution>
    </executions>
</plugin>
When launching our application, we will observe that in the target/cxf folder we will have content that we didn't have before, more specifically we will be able to see that all the classes and an interface have been created that match what we have on our SOAP server.
Consuming the service.
Creating the required instances.
We are going to proceed then to start making requests to the service, to respect how Spring usually works, we are going to create the corresponding Bean from the interface that the plugin has autogenerated for us, for this the library that we have previously introduced cxf-spring-boot-starter-jaxws provides us with the JaxWsProxyFactoryBean class to create the corresponding instance.
For all this process of creating the instance of the beans, I am going to create a SOAPConfig class and in it I will create a function, the complete class is going to look like this:
package dev.mpesteban.soapconsumer;

import org.apache.cxf.ext.logging.LoggingInInterceptor;
import org.apache.cxf.ext.logging.LoggingOutInterceptor;
import org.apache.cxf.jaxws.JaxWsProxyFactoryBean;
import org.slf4j.Logger;
import org.slf4j.LoggerFactory;
import org.springframework.context.annotation.Configuration;

@Configuration
public class SOAPConfig {

    private static final Logger log = LoggerFactory.getLogger(SOAPConfig.class);

    private <T> T generateWithEndpointUrl(final String endpointUrl, final Class<T> clazz) {
        JaxWsProxyFactoryBean factory = new JaxWsProxyFactoryBean();
        factory.setServiceClass(clazz);
        factory.setAddress(endpointUrl);

        LoggingInInterceptor loggingInInterceptor = new LoggingInInterceptor();
        loggingInInterceptor.setPrettyLogging(true);
        factory.getInInterceptors().add(loggingInInterceptor);

        LoggingOutInterceptor loggingOutInterceptor = new LoggingOutInterceptor();
        loggingOutInterceptor.setPrettyLogging(true);
        factory.getOutInterceptors().add(loggingOutInterceptor);

        T portserviceType = factory.create(clazz);

        log.info("Create proxy factory for service class: " + clazz.getName());

        return (T) portserviceType;
    }


}
This method will allow me to easily create the instance, to consume my SOAP service, and specify the URL, this is because it may be that even though the definition uses a specific environment, then when promoting to higher environments it will vary, also in In the event that we consume multiple SOAP services, we could re-use this method.
Finally, in the same class, SOAPConfig, I am going to add the method with the annotation @Bean to make this instance available to the spring container.
@Bean
public MySoapService mySoapServiceBean() {
    return generateWithEndpointUrl("http://localhost:8080/ws/Hello", MySoapService.class);
}
For this test I have put the URL directly, but ideally this value would come from the .properties file or environment variables for example.
Setup endpoint for check the integration.
To do a quick test and check that we can correctly consume our SOAP service I am going to create a MyTestingController class with the @RestController annotation, to which I will inject the MySoapService and call the method that I create in the SOAP service getCardsByBrand
package dev.mpesteban.soapconsumer;

import dev.mpesteban.soapservice.Car;
import dev.mpesteban.soapservice.MySoapService;
import org.springframework.beans.factory.annotation.Autowired;
import org.springframework.web.bind.annotation.GetMapping;
import org.springframework.web.bind.annotation.RequestParam;
import org.springframework.web.bind.annotation.RestController;

import java.util.List;

@RestController
public class MyTestingController {

    @Autowired
    private MySoapService mySoapService;

    @GetMapping("/getCarByBrand")
    public List<Car> getCarByBrand(@RequestParam String brand) {
        return mySoapService.getCarsByBrand(brand);
    }

}
With this done, I will start both the SOAP server that I created in the previous article and the application that we have been creating in this article. In my specific case, since I am running them on the same machine, I have changed the port of the application to 8085.
In the browser, if we go to: http://localhost:8085/getCarsByBrand?brand=honda we can see that the following JSON is returned.
[
    {
        "brand": "Honda",
        "horsepower": 300,
        "model": "Civic"
    },
    {
        "brand": "Honda",
        "horsepower": 90,
        "model": "Jazz"
    }
]
With this we can conclude that our integration is working correctly.